-
Getting Started
-
Garmin Devices
- Garmin Device Firmware Guide
- Check Garmin Device Firmware
- Set up and Connect Garmin Index2 Scale
- Screen Control on Garmin Wearables
- How to charge Garmin devices best
- Wearable and Device ID Management
- Setup: Prepare Wearable Devices
- Compatible Garmin Devices
- Garmin Timezone & Time
- Wifi Capabilities and Restrictions of Garmin Devices
-
Setup
-
Manage
-
Data Collection
- Collect Data: Synchronization Types
- Collect Data: Tablet Sync (multi-sync) with "Fitrockr Hub (Multi-Sync)" app
- Collect Data: Smartphone Sync (single-sync) with Garmin Connect app
- Collect Data: Overview
- Collect Data: Smartphone Sync (single-sync) with Fitrockr app
- Collect Data: Sync via USB cable to Laptop
- Collect Data: Smartphone Sync (single-sync) with Omron Blood Pressure Monitors
- Apple Health and Google Health Connect
- Withings
- Wifi Capabilities and Restrictions of Garmin Devices
- Wearable Sync Methods and Frequencies
- Samsung Health
- Oura
- Polar
-
Track
-
Analyze
- Analyze: Overview
- Analyze: Data Export
- Analyze: Standard Reports
- Analyze: Sleep Analysis
- Analyze: Vitality Report
- Analyze: 6 Minute Walk Test
- Analyze: Body Battery
- Analyze: HRV
- Analyze: Activities
- Analyze: Live Streaming
- Analyze: Analytics Studio
- Analyze: Share
- Setup: Onboarding & First Steps
- Analyze: Data Export (Accelerometer & Gyroscope)
-
Other
-
Trouble Shooting
-
Definitions
-
FAQ
- How to use HR monitor strap
- What happens when a Garmin device runs full?
- How to read Accelerometer json output file
- How to get access to Dexcom data
- Which Garmin devices support Wifi sync
- How to free up and reclaim licenses
- How to do a complete data export
- How to enable notifications on the wearable
- Why are some values longer than the given timeframe
- How to pair the Garmin Index Sleep Monitor
- How to get GPS data
-
Blog
Sync via USB cable to Laptop
The file upload allows recorded data from a Garmin device to be uploaded to a user profile. This syncing scenario is ideal for large data amounts (e.g. accelerometer) or if Bluetooth sync did not work and data needs to be transferred.
Important Information
Prior using the file upload, you need to configure the Garmin device with the Data Sampling Rate. To do so, you need to sync the Garmin device once with the Fitrockr app. This will transfer the settings to the device. Afterwards, you disconnect the device from the Fitrockr app to prevent it from further syncing with the app as you will be syncing with the USB cable attached to a Laptop.
Also, make sure to thoroughly read the warning instructions at the bottom of this article!
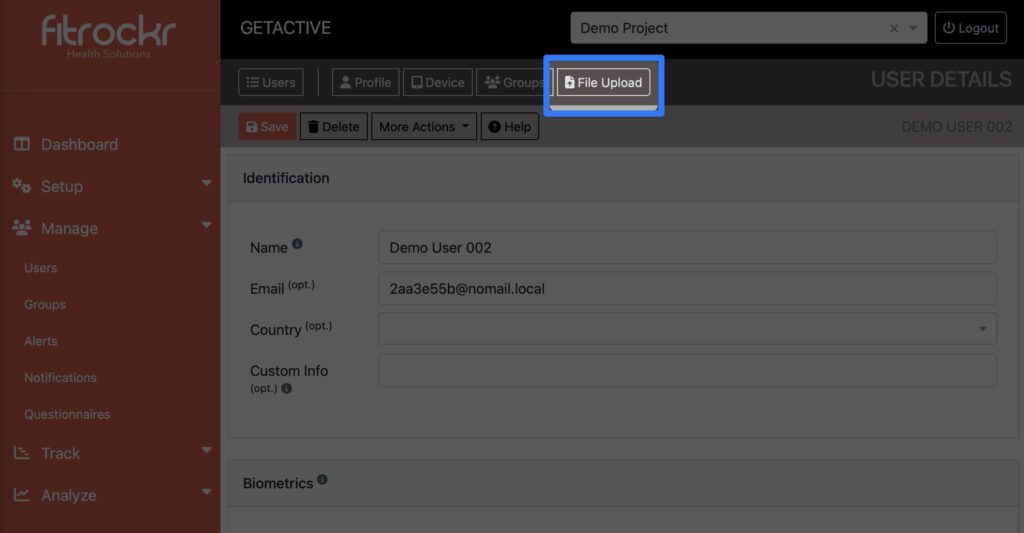
(1) Go to Manage > Users
(2) Edit User
(3) Select File Upload
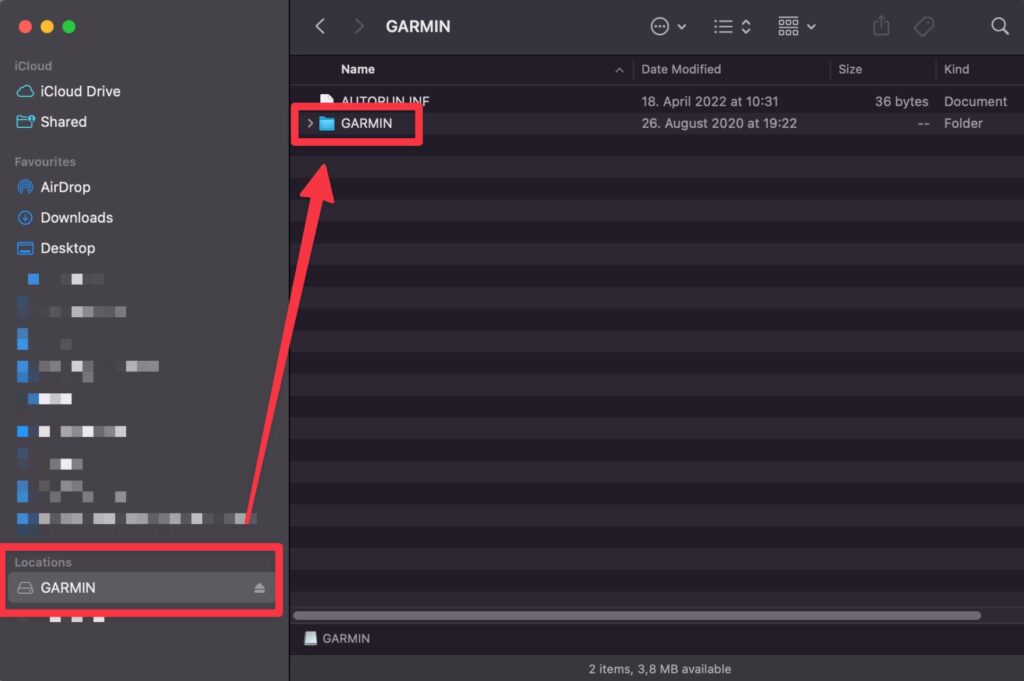
(4) Connect Garmin device to computer via USB
(5) Open Explorer (Windows) or Finder (Mac)
(6) Select the Garmin device
If Garmin device does not show up, mass storage feature may need to be enabled on the device or it may need to be reconnected via USB. Consult Google on trouble-shooting tips if Garmin device does not show up.
If Garmin device still does not show up, you can install an application to view the content of a connected Android device.
Mac OS: Android File Transfer App
Win OS: Android File Manager
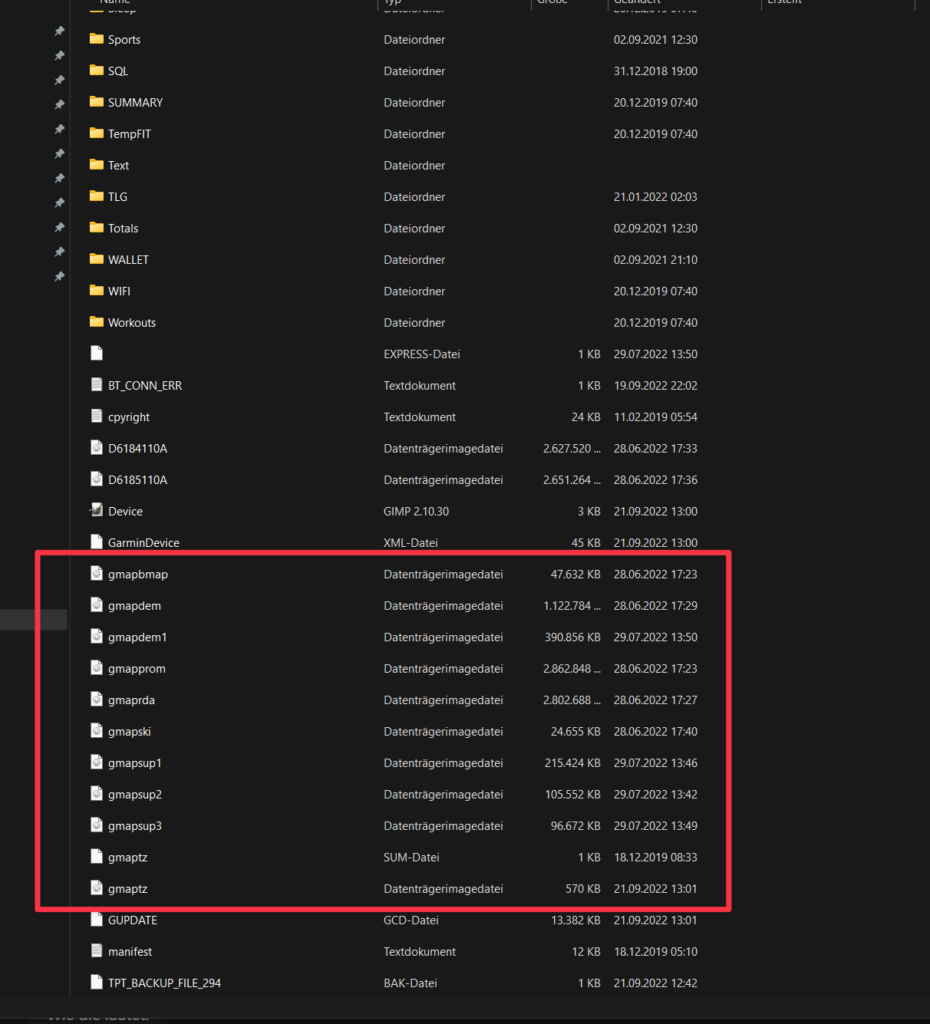
(7) Copy the folder “Garmin” to the computer hard drive
(8) Check whether folder includes map or image data (only applicable to some Garmin models). Map and image data can be found on the root level and identified via the file name including “map” or the file extension “.img” on the main folder. Delete these files as they are too large to upload.
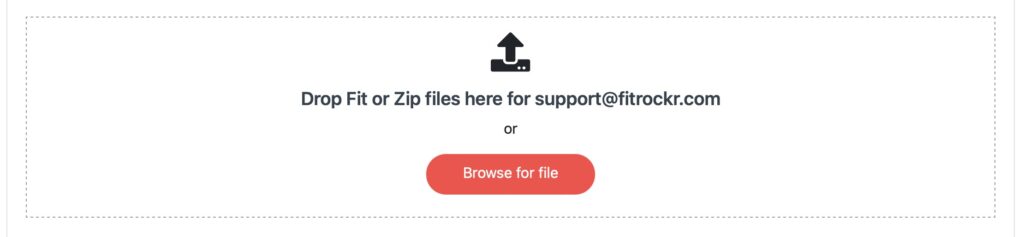
(9) Zip the folder
(10) Upload the zip file to Fitrockr. Upload limit is set to 512 MB. If zip file is larger, cut it into several files.
(11) Data will be automatically processed and associated with the user account
(12) After synchronization, the following folders (or content inside the folders) on the device can be deleted to free up space or clear the data for the next user:
Activity, HSA, Metrics, Monitor, Sleep
If you delete the folders, device will automatically recreate them.
These folders contain all activity and health data recordings.
FIT File Upload supports the following data types at the moment:
 Dailies
Stress
SPO2 (PulseOx)
Accelerometer
Gyroscope
Heart Rate
Intraday
BBI
Activities
Sleep (on device sleep only)
Respiration
Zero crossing
Actigraphy
Step Log
Motion intensity
Skin Temperature
WARNING: Data Loss Risk when Battery Runs Empty!
Read about this important information at https://www.fitrockr.com/help-center/frozen-device-time-and-data-loss-due-to-empty-device-battery/